From this calendar, you can:
- See team availability and working hours at a glance
- Assign or invite Service Providers to bookings
- Drag & drop to reschedule appointments
How to access the Scheduler
- Go to Calendar from the main menu
- Click the Scheduler tab
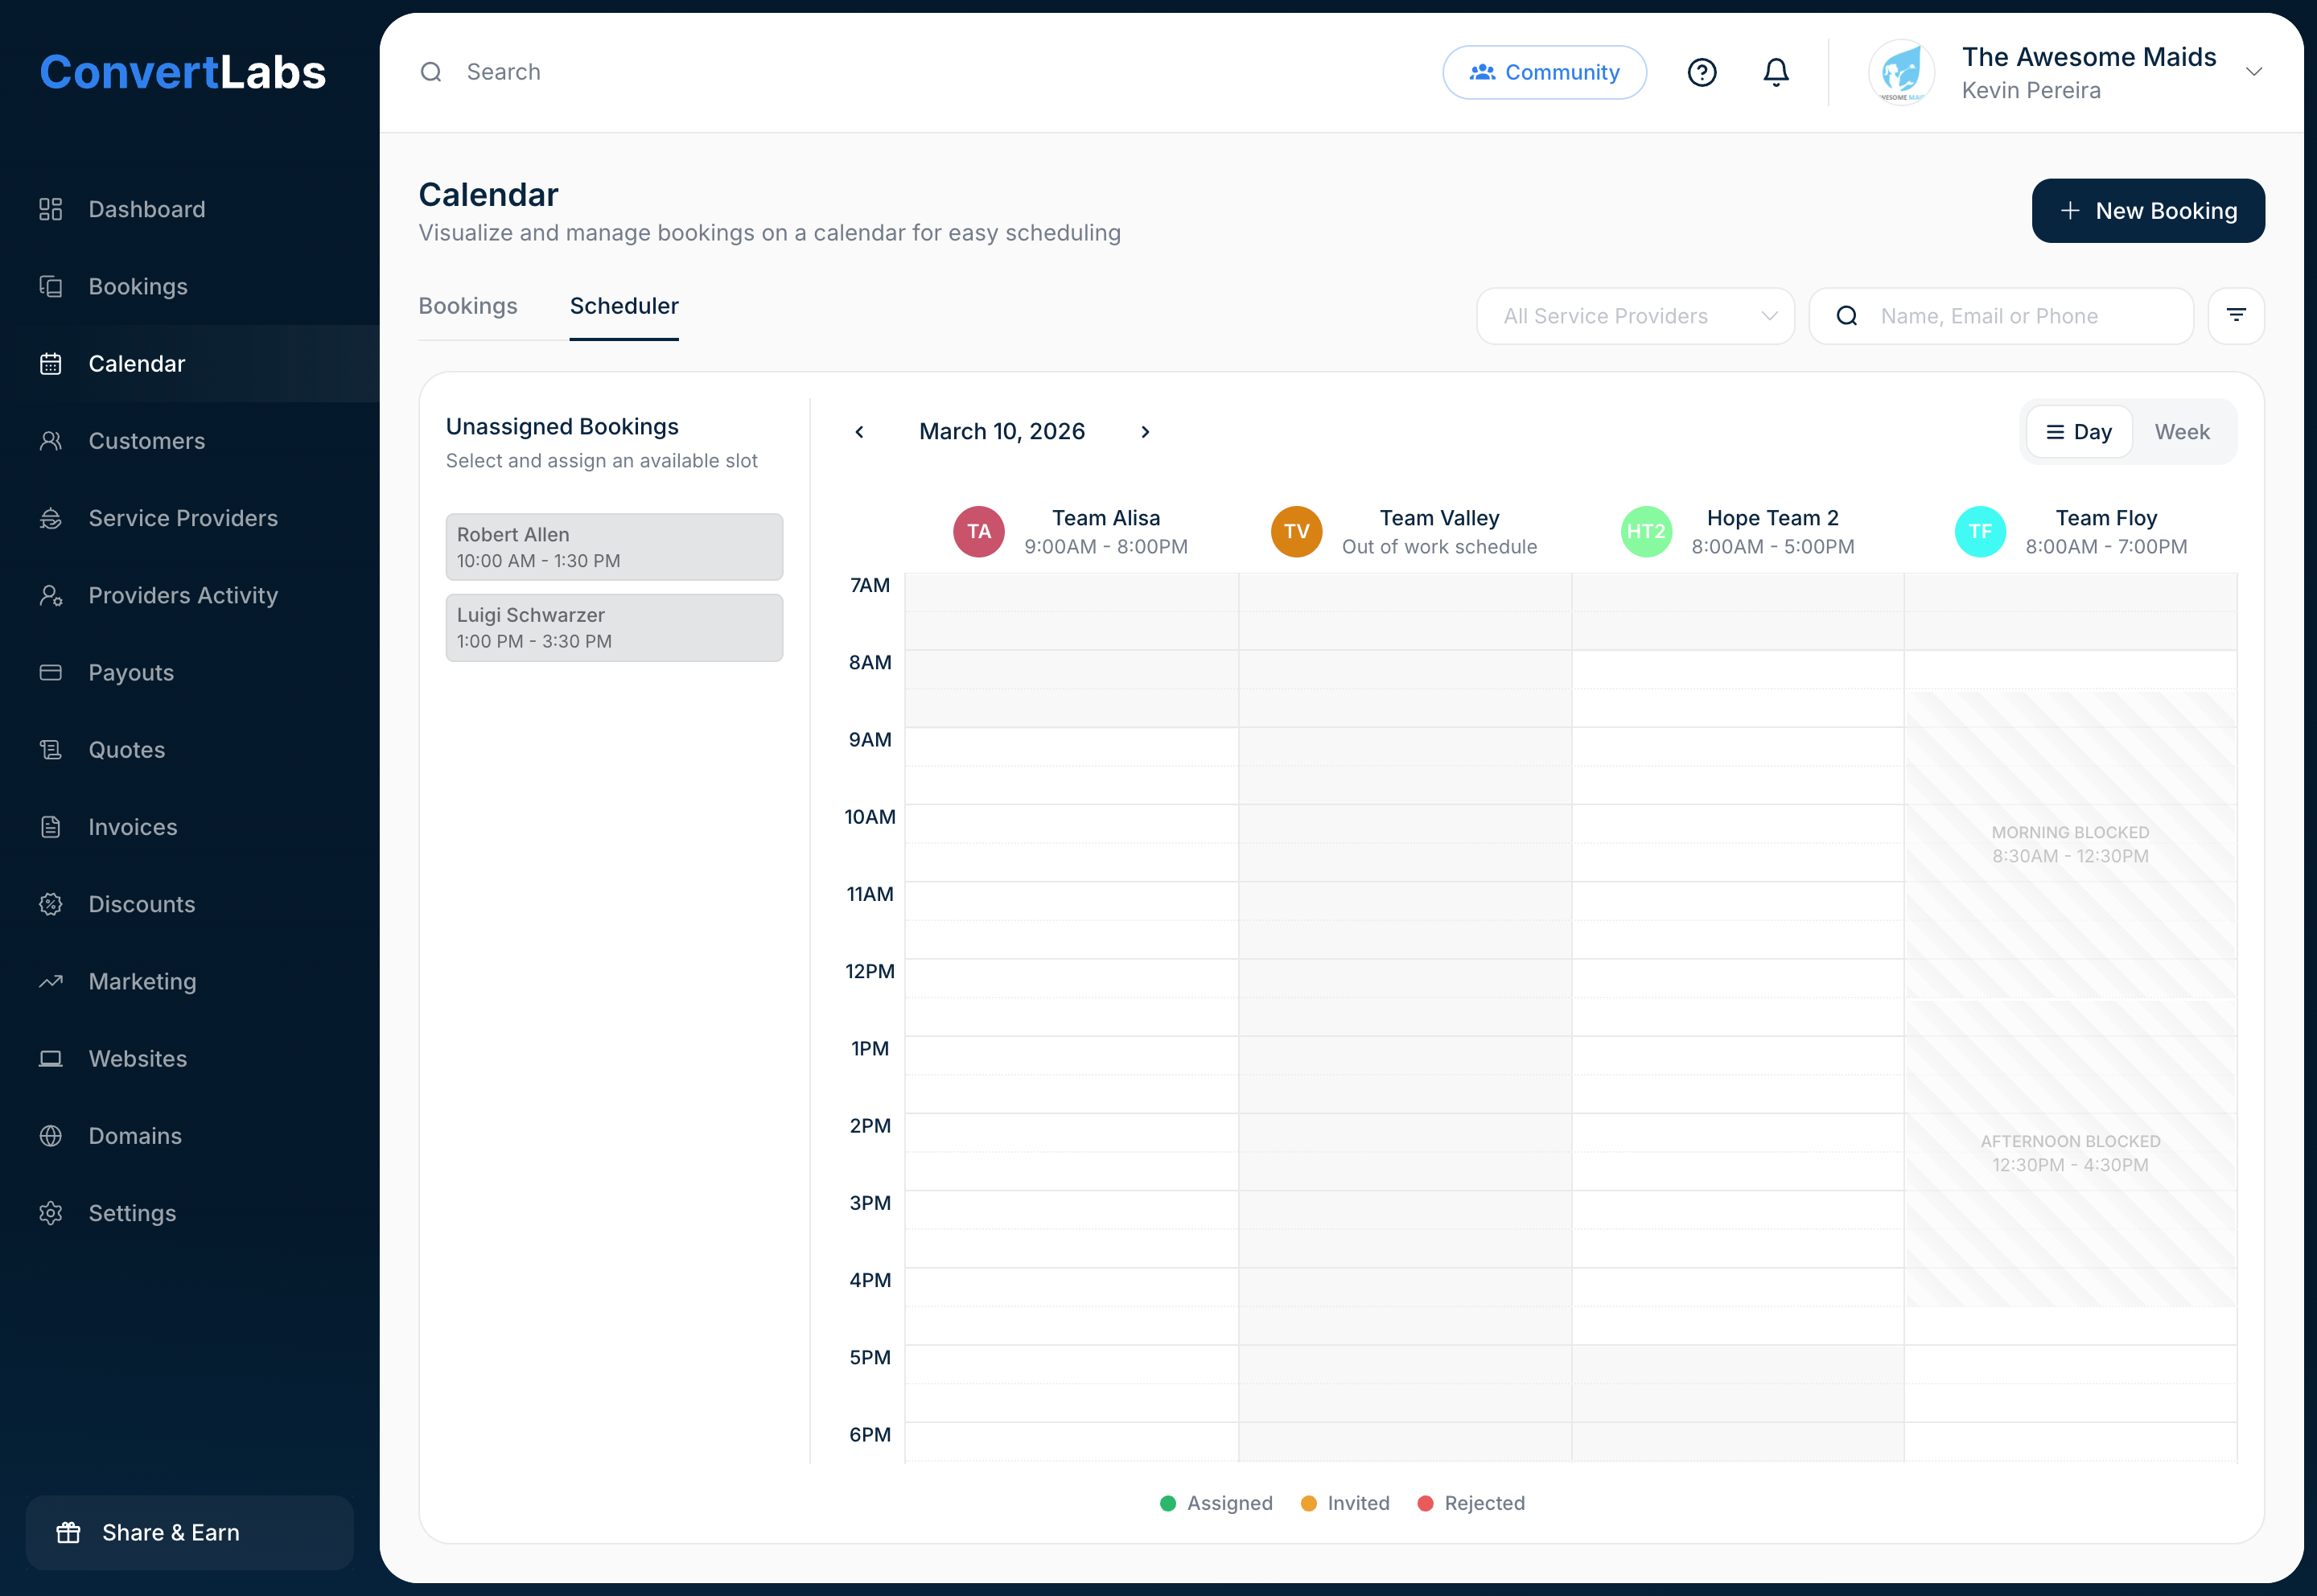
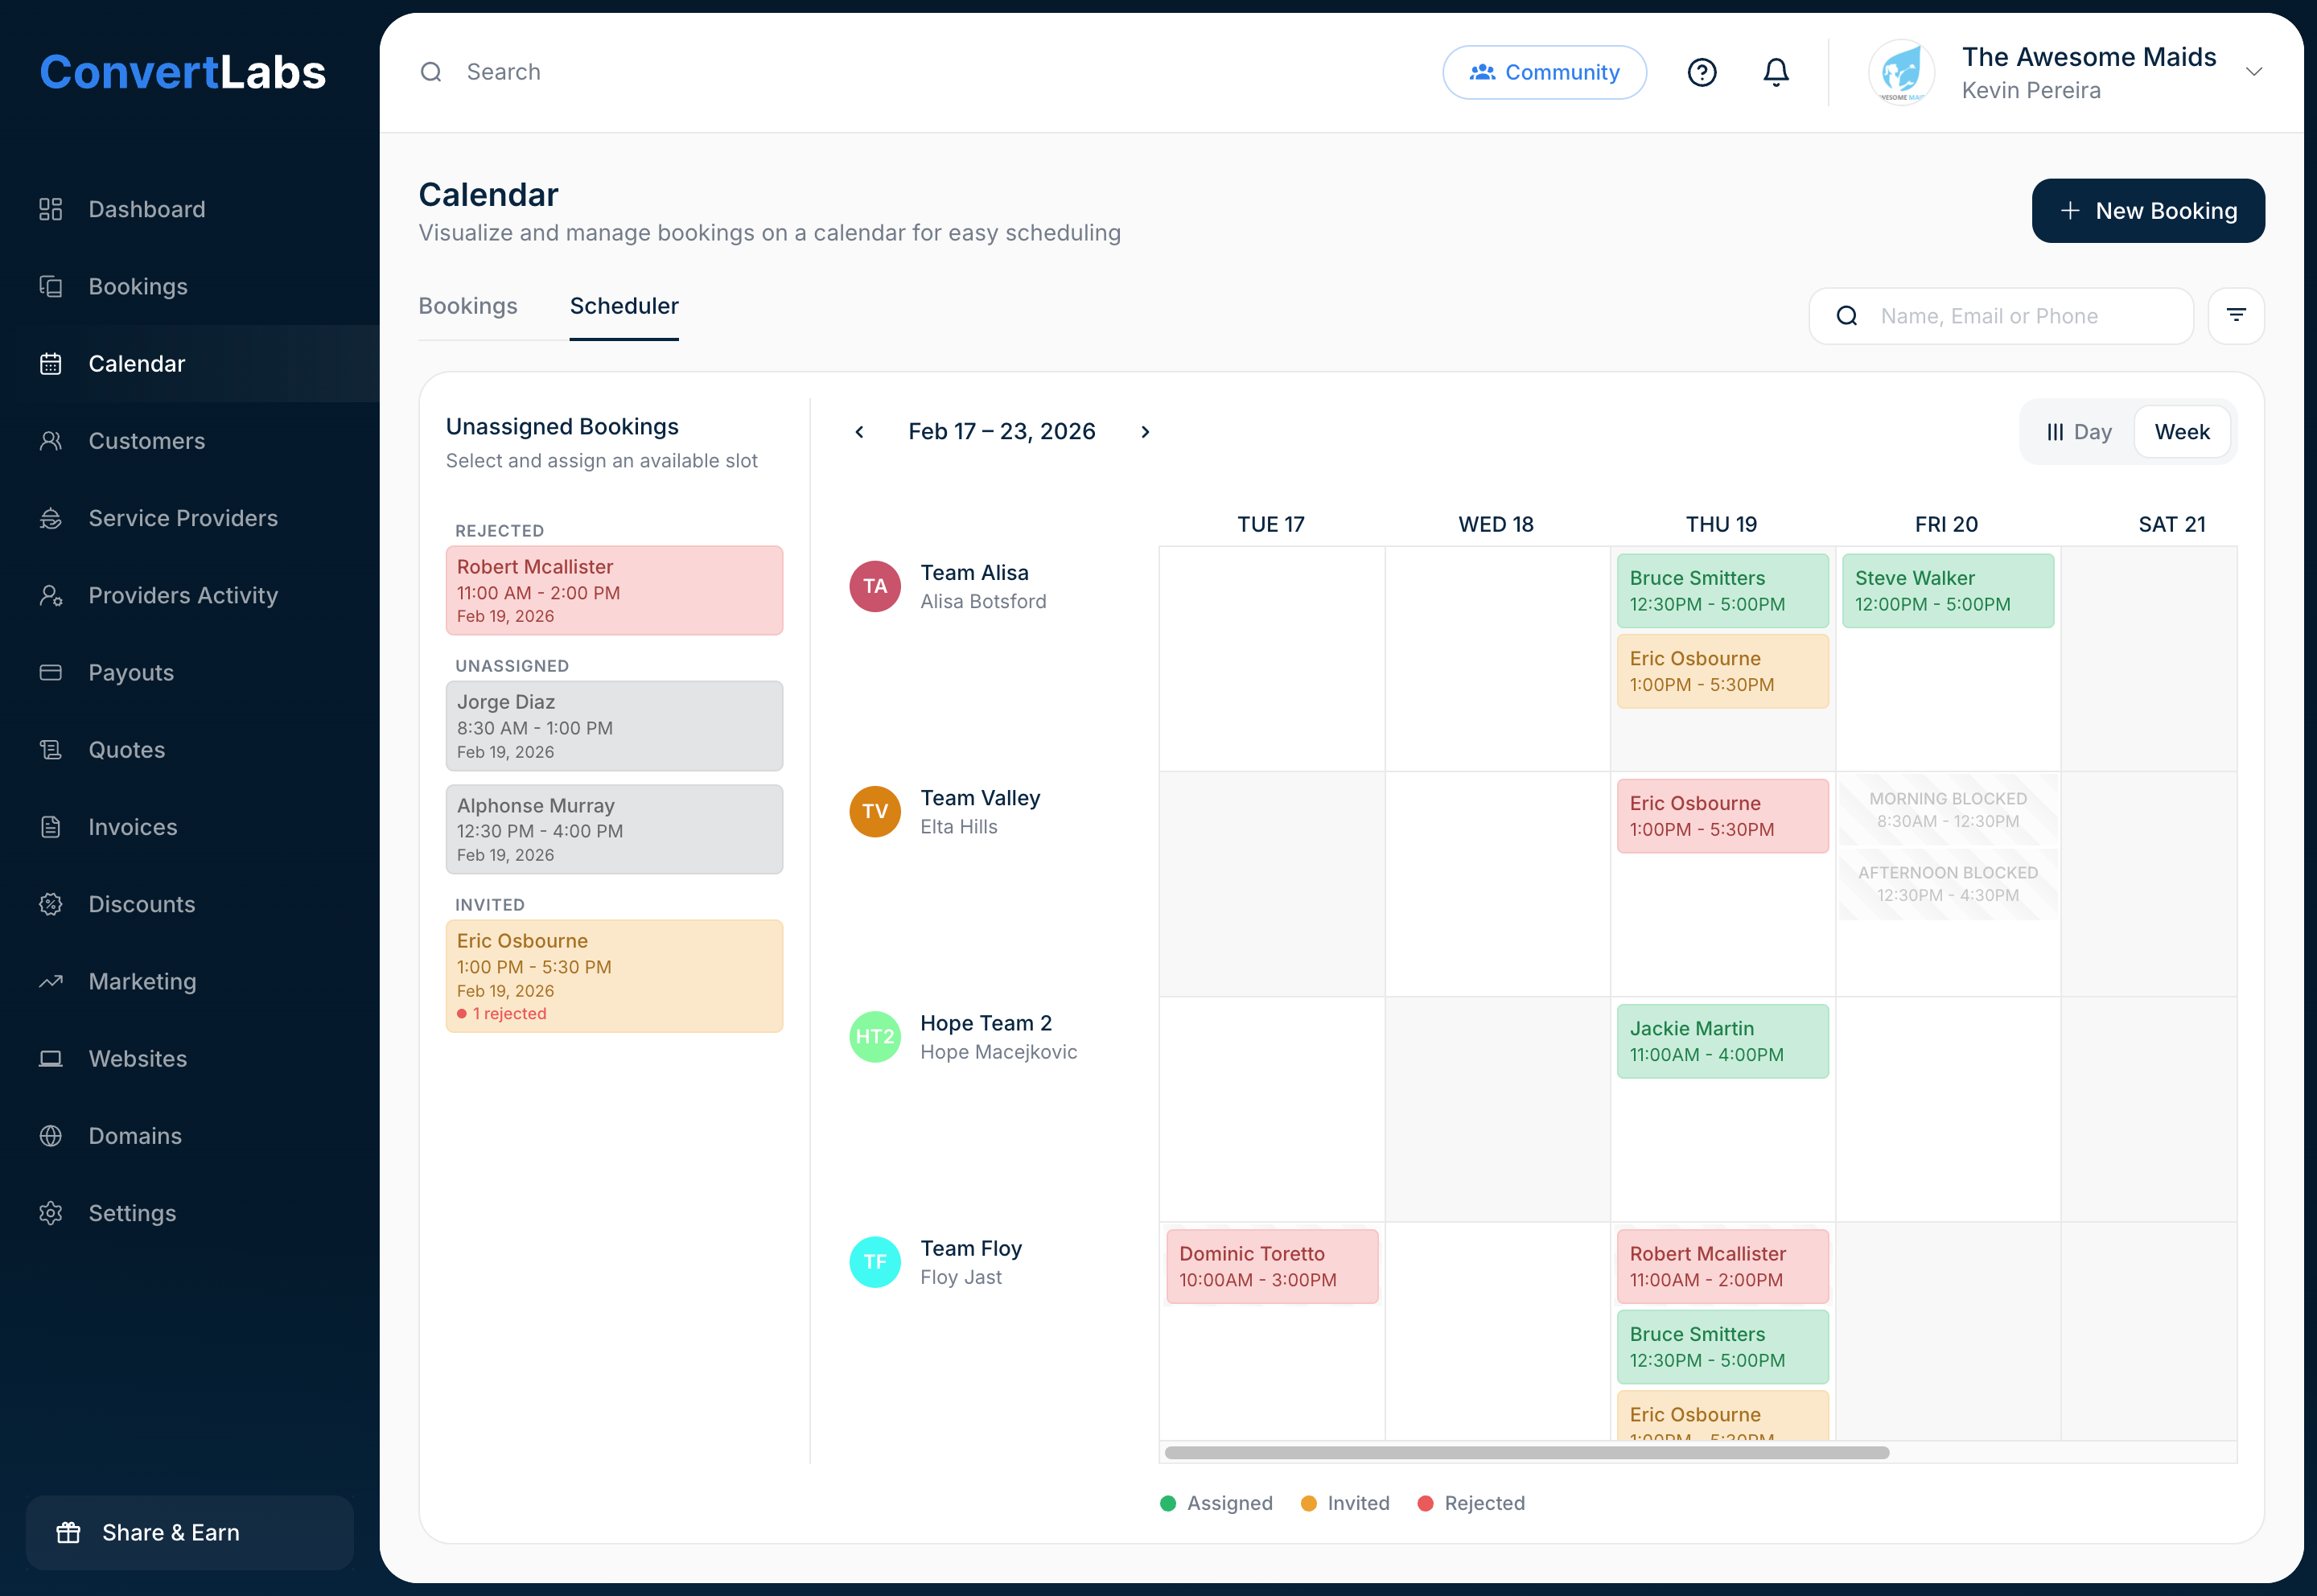
Understanding the Scheduler View
The Scheduler displays your Service Providers and their availability in a daily or weekly calendar view, along with the bookings they are assigned to or invited to.
The calendar automatically adapts to the working schedules configured for your teams.
Calendar Cells for Availability
The calendar background helps indicate provider availability through different cell colors:
- White background → Working hours (available to book)
- Light Gray background → Outside work schedule
- Gray diagonal lines → Time slot blocked by the Service Provider
Booking Status Colors
Bookings appear on the calendar and are color-coded by status:
🟢 Green → Assigned bookings (confirmed)
🟡 Yellow → Invited bookings (pending response)
🔴 Red → Rejected invitations

Assigning Bookings
On the left side of the Scheduler, you'll find the Unassigned Bookings panel. These are bookings that still need to be assigned to a provider.
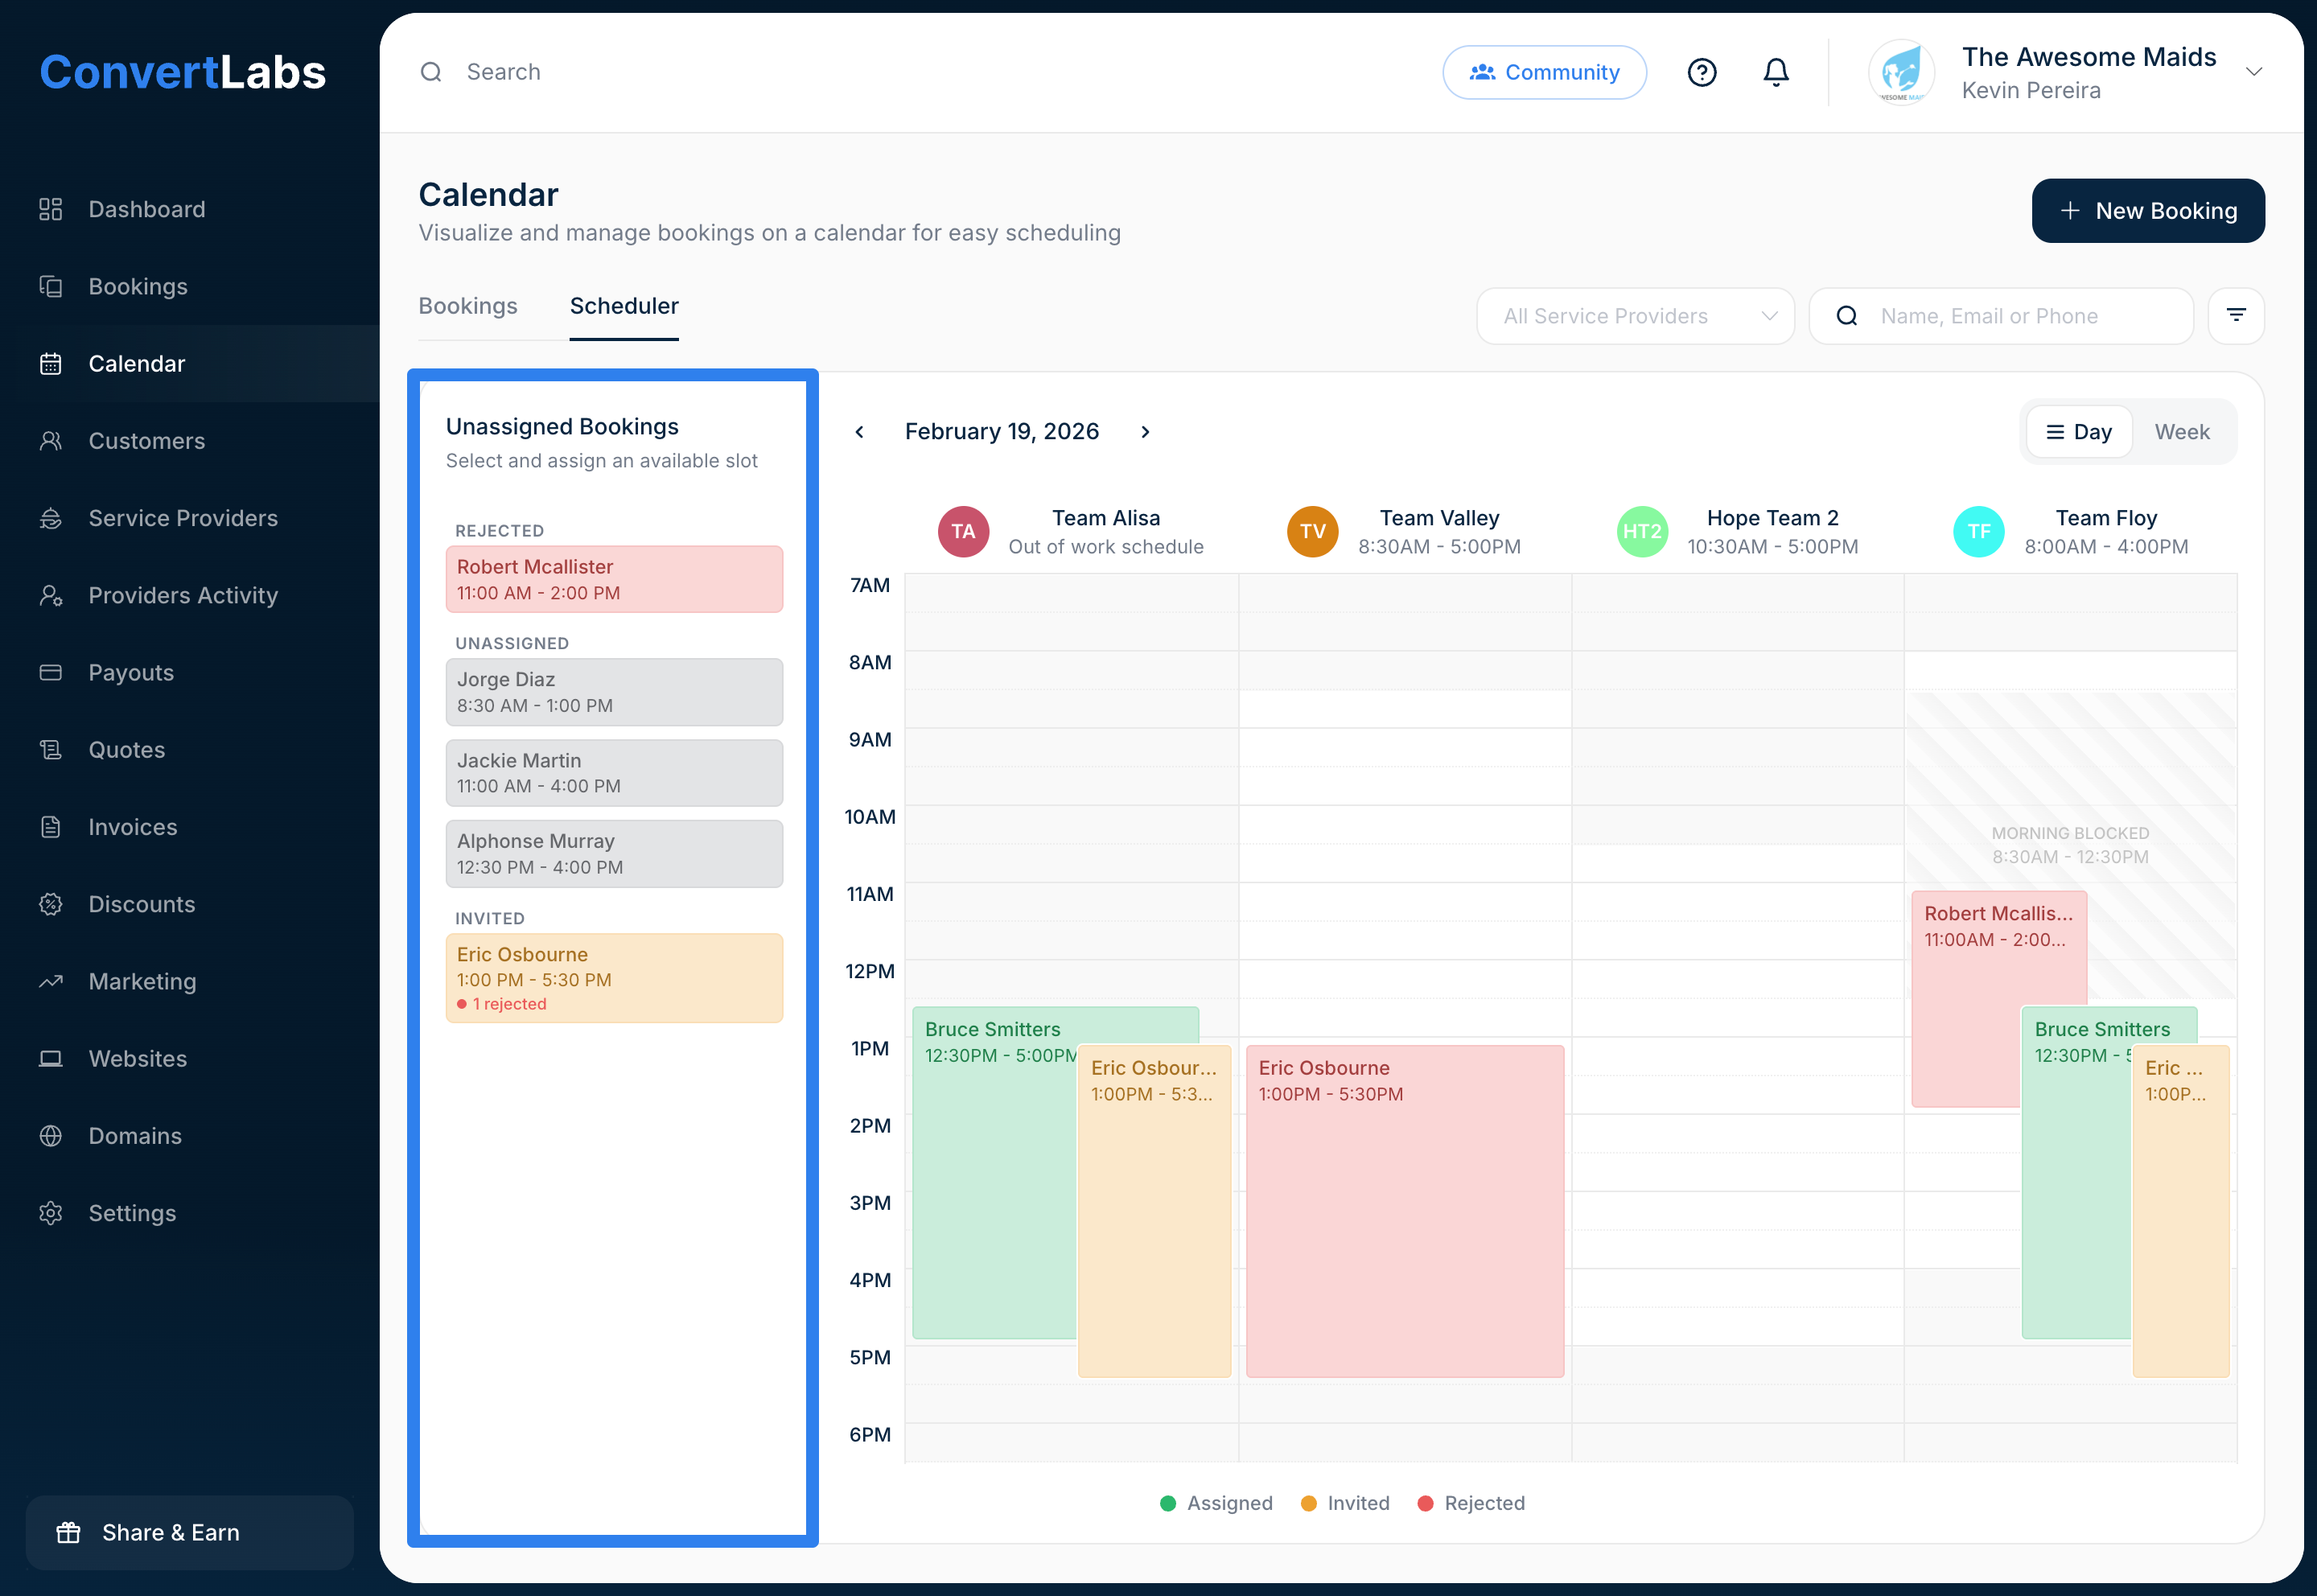
🔴 Rejected → All invited providers declined (requires attention)
⚪ Unassigned → No invitations sent yet
🟡 Invited → All Service Providers invited, some may have declined, but there are still active invites.
This helps you focus on bookings that need immediate action.
To assign or invite providers directly from this panel, follow these steps:
-
Select an unassigned booking
Select any booking from the unassigned bookings panel
.png)
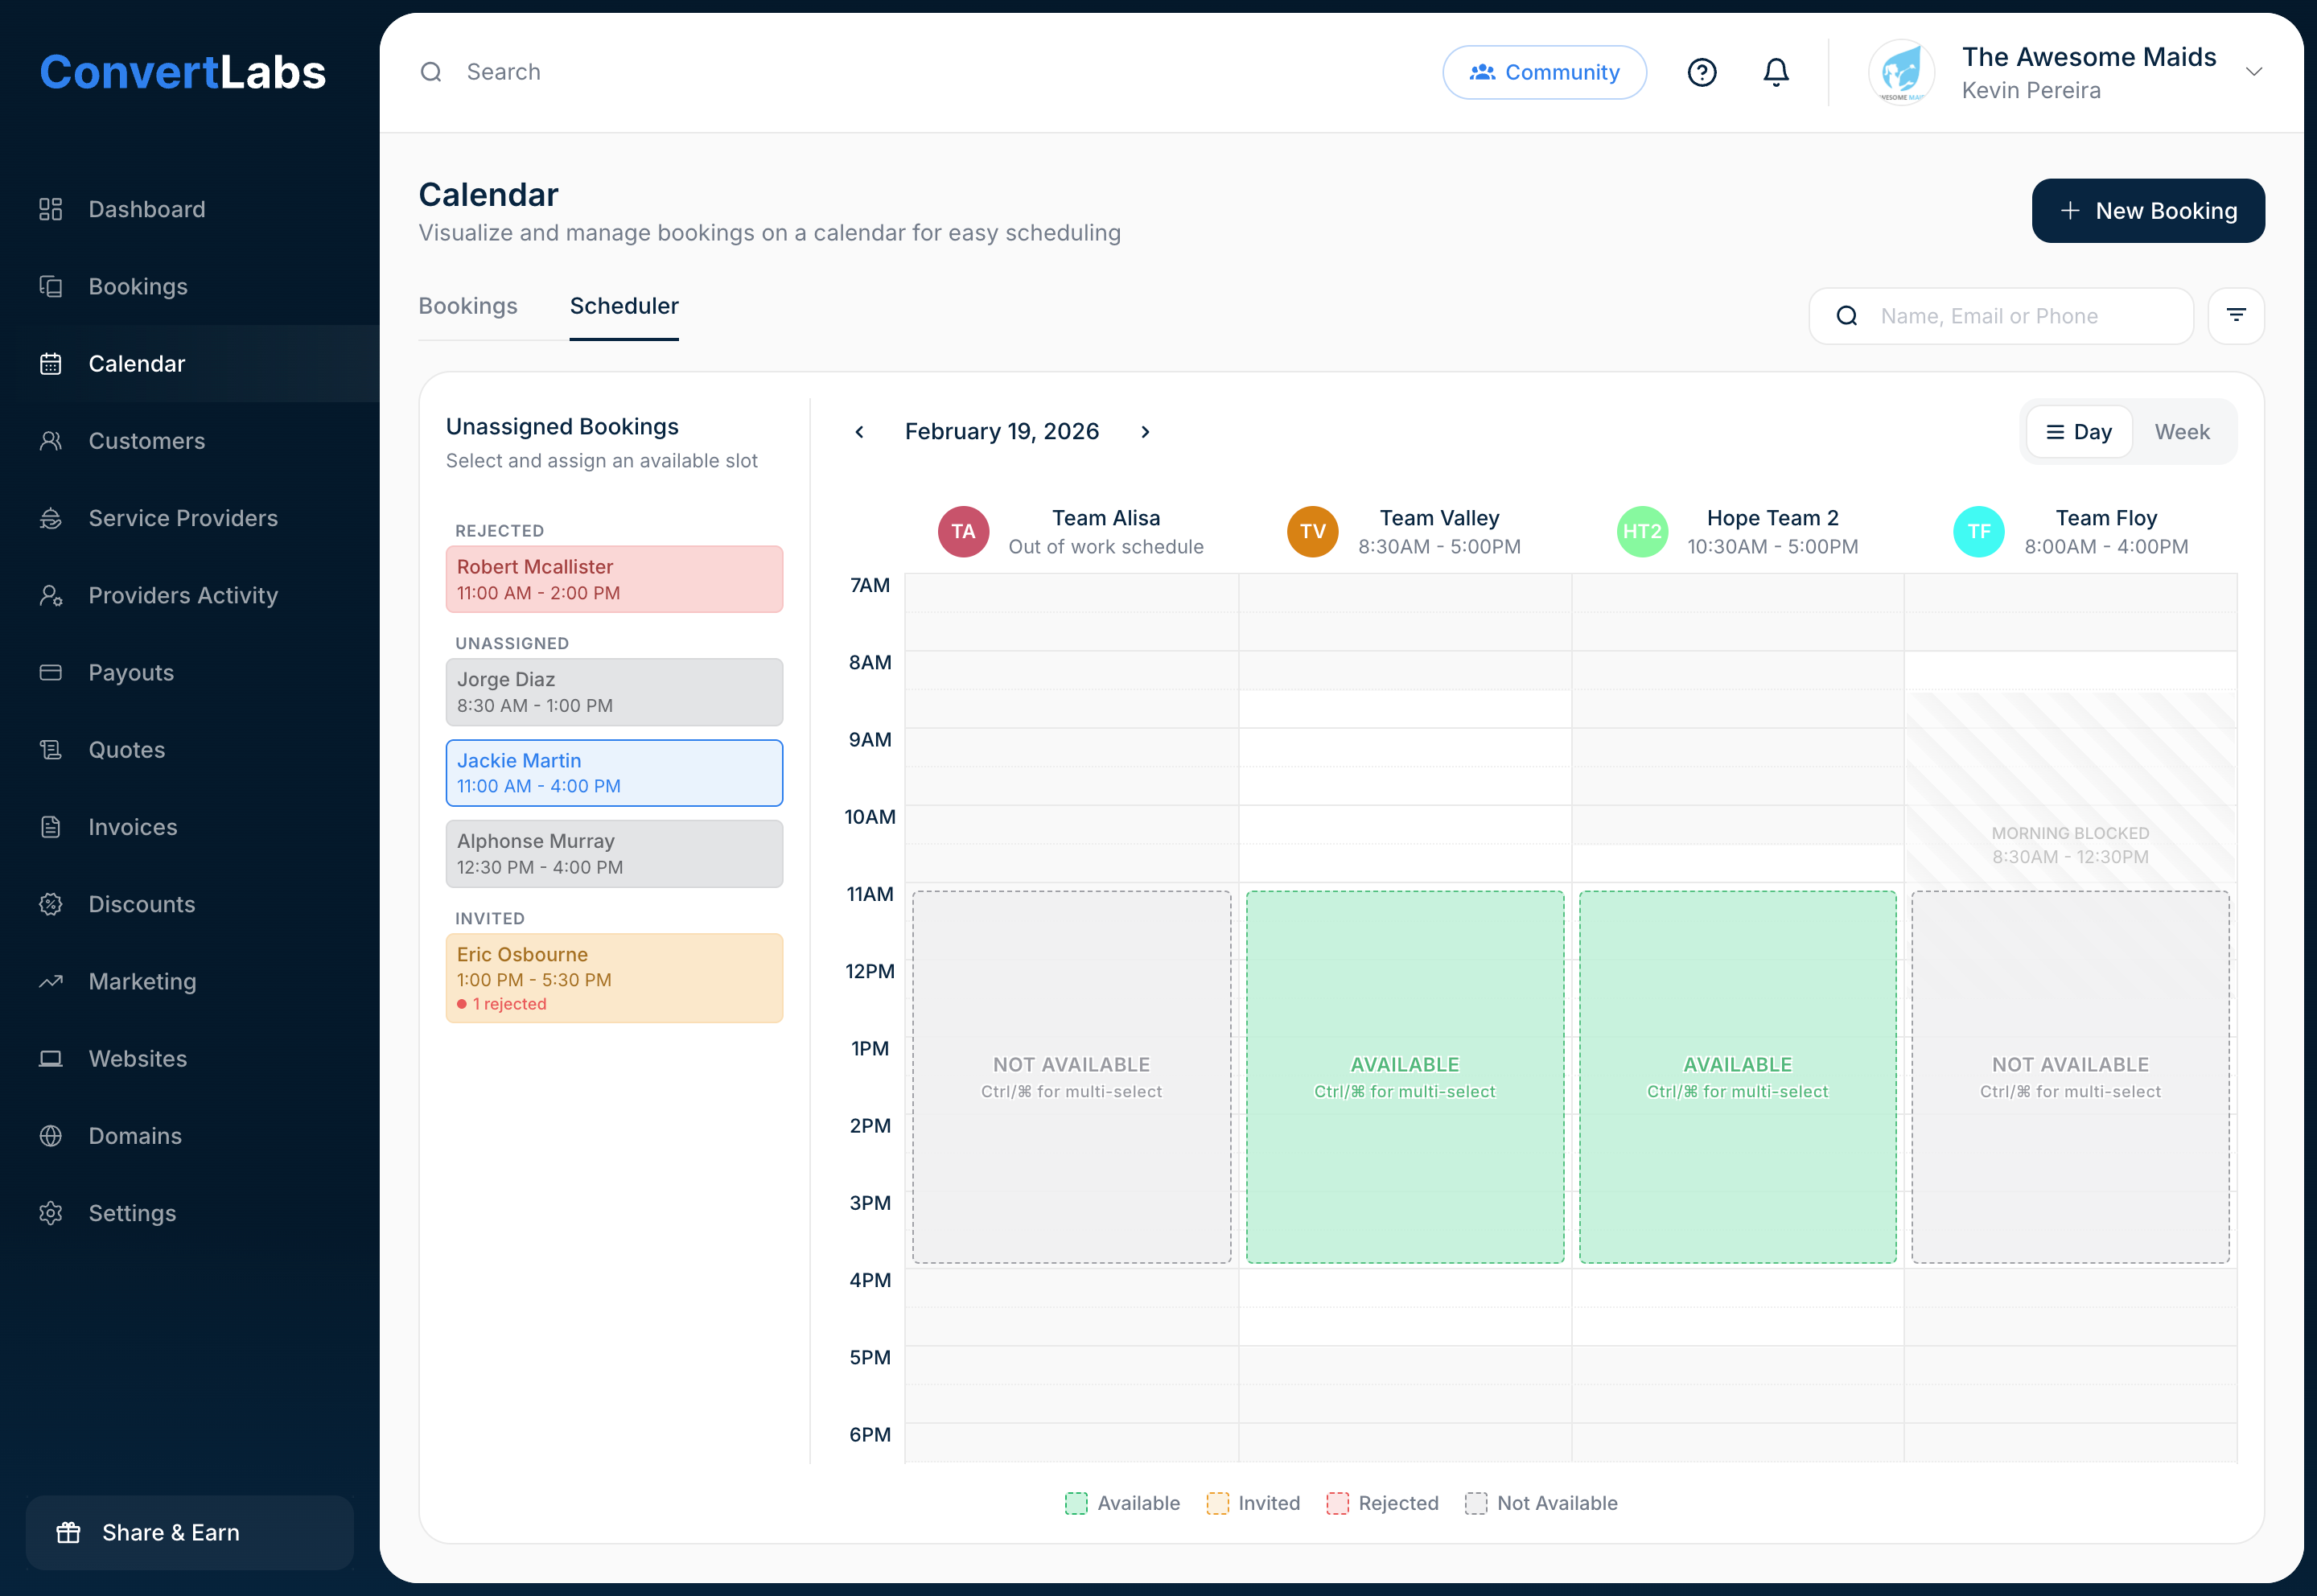
What happens next:
- Existing calendar bookings temporarily fade out
- The slots where the selected booking would go are highlighted on the calendar
- You'll see color-coded availability for the slots:
🟢 AVAILABLE (Green highlight)
└─ Service Provider is available and within working hours⚠️ NOT AVAILABLE (Gray highlight)
└─ Conflicts exist: Outside working hours, time blocked by service provider or already has another booking at this time🟡 ALREADY INVITED (Yellow highlight)
└─ Service Provider was previously invited to this booking🔴 REJECTED (Red highlight)
└─ Service Provider declined this booking
-
Select one or more providers
Click a slot to select a Service Provider. You can select multiple providers or time slots at once:
- Windows: Hold Ctrl while clicking
- Mac: Hold ⌘ (Command) while clicking
-
Review the confirmation window
A confirmation window will open where you can review the selected providers, see any scheduling conflicts, and check the reasons for unavailability.
Example conflicts shown:
- "Morning blocked by provider"
- "Outside work hours (10:30 AM - 5:00 PM)"
- "Booking with John Smith (2:00 PM - 5:00 PM)"
Assign → Immediately assigns the booking.png)
After that, choose your next action:
Send invitation instead → Sends invitation (providers can accept/decline)
Cancel → Goes back to calendar
Day vs Week View
The Scheduler offers two calendar views for different needs.
📅 Day View
Best for: Detailed scheduling and seeing exact time slots

📆 Week View
Best for: Viewing scheduling patterns across multiple days. This view prioritizes visibility over detail.
Drag & Drop Rescheduling
You can quickly reschedule bookings by dragging them to a new time slot.
- Click and hold on any booking
- Drag to the new time slot
- Release to confirm the new time slot
A confirmation window will appear to confirm the reschedule.
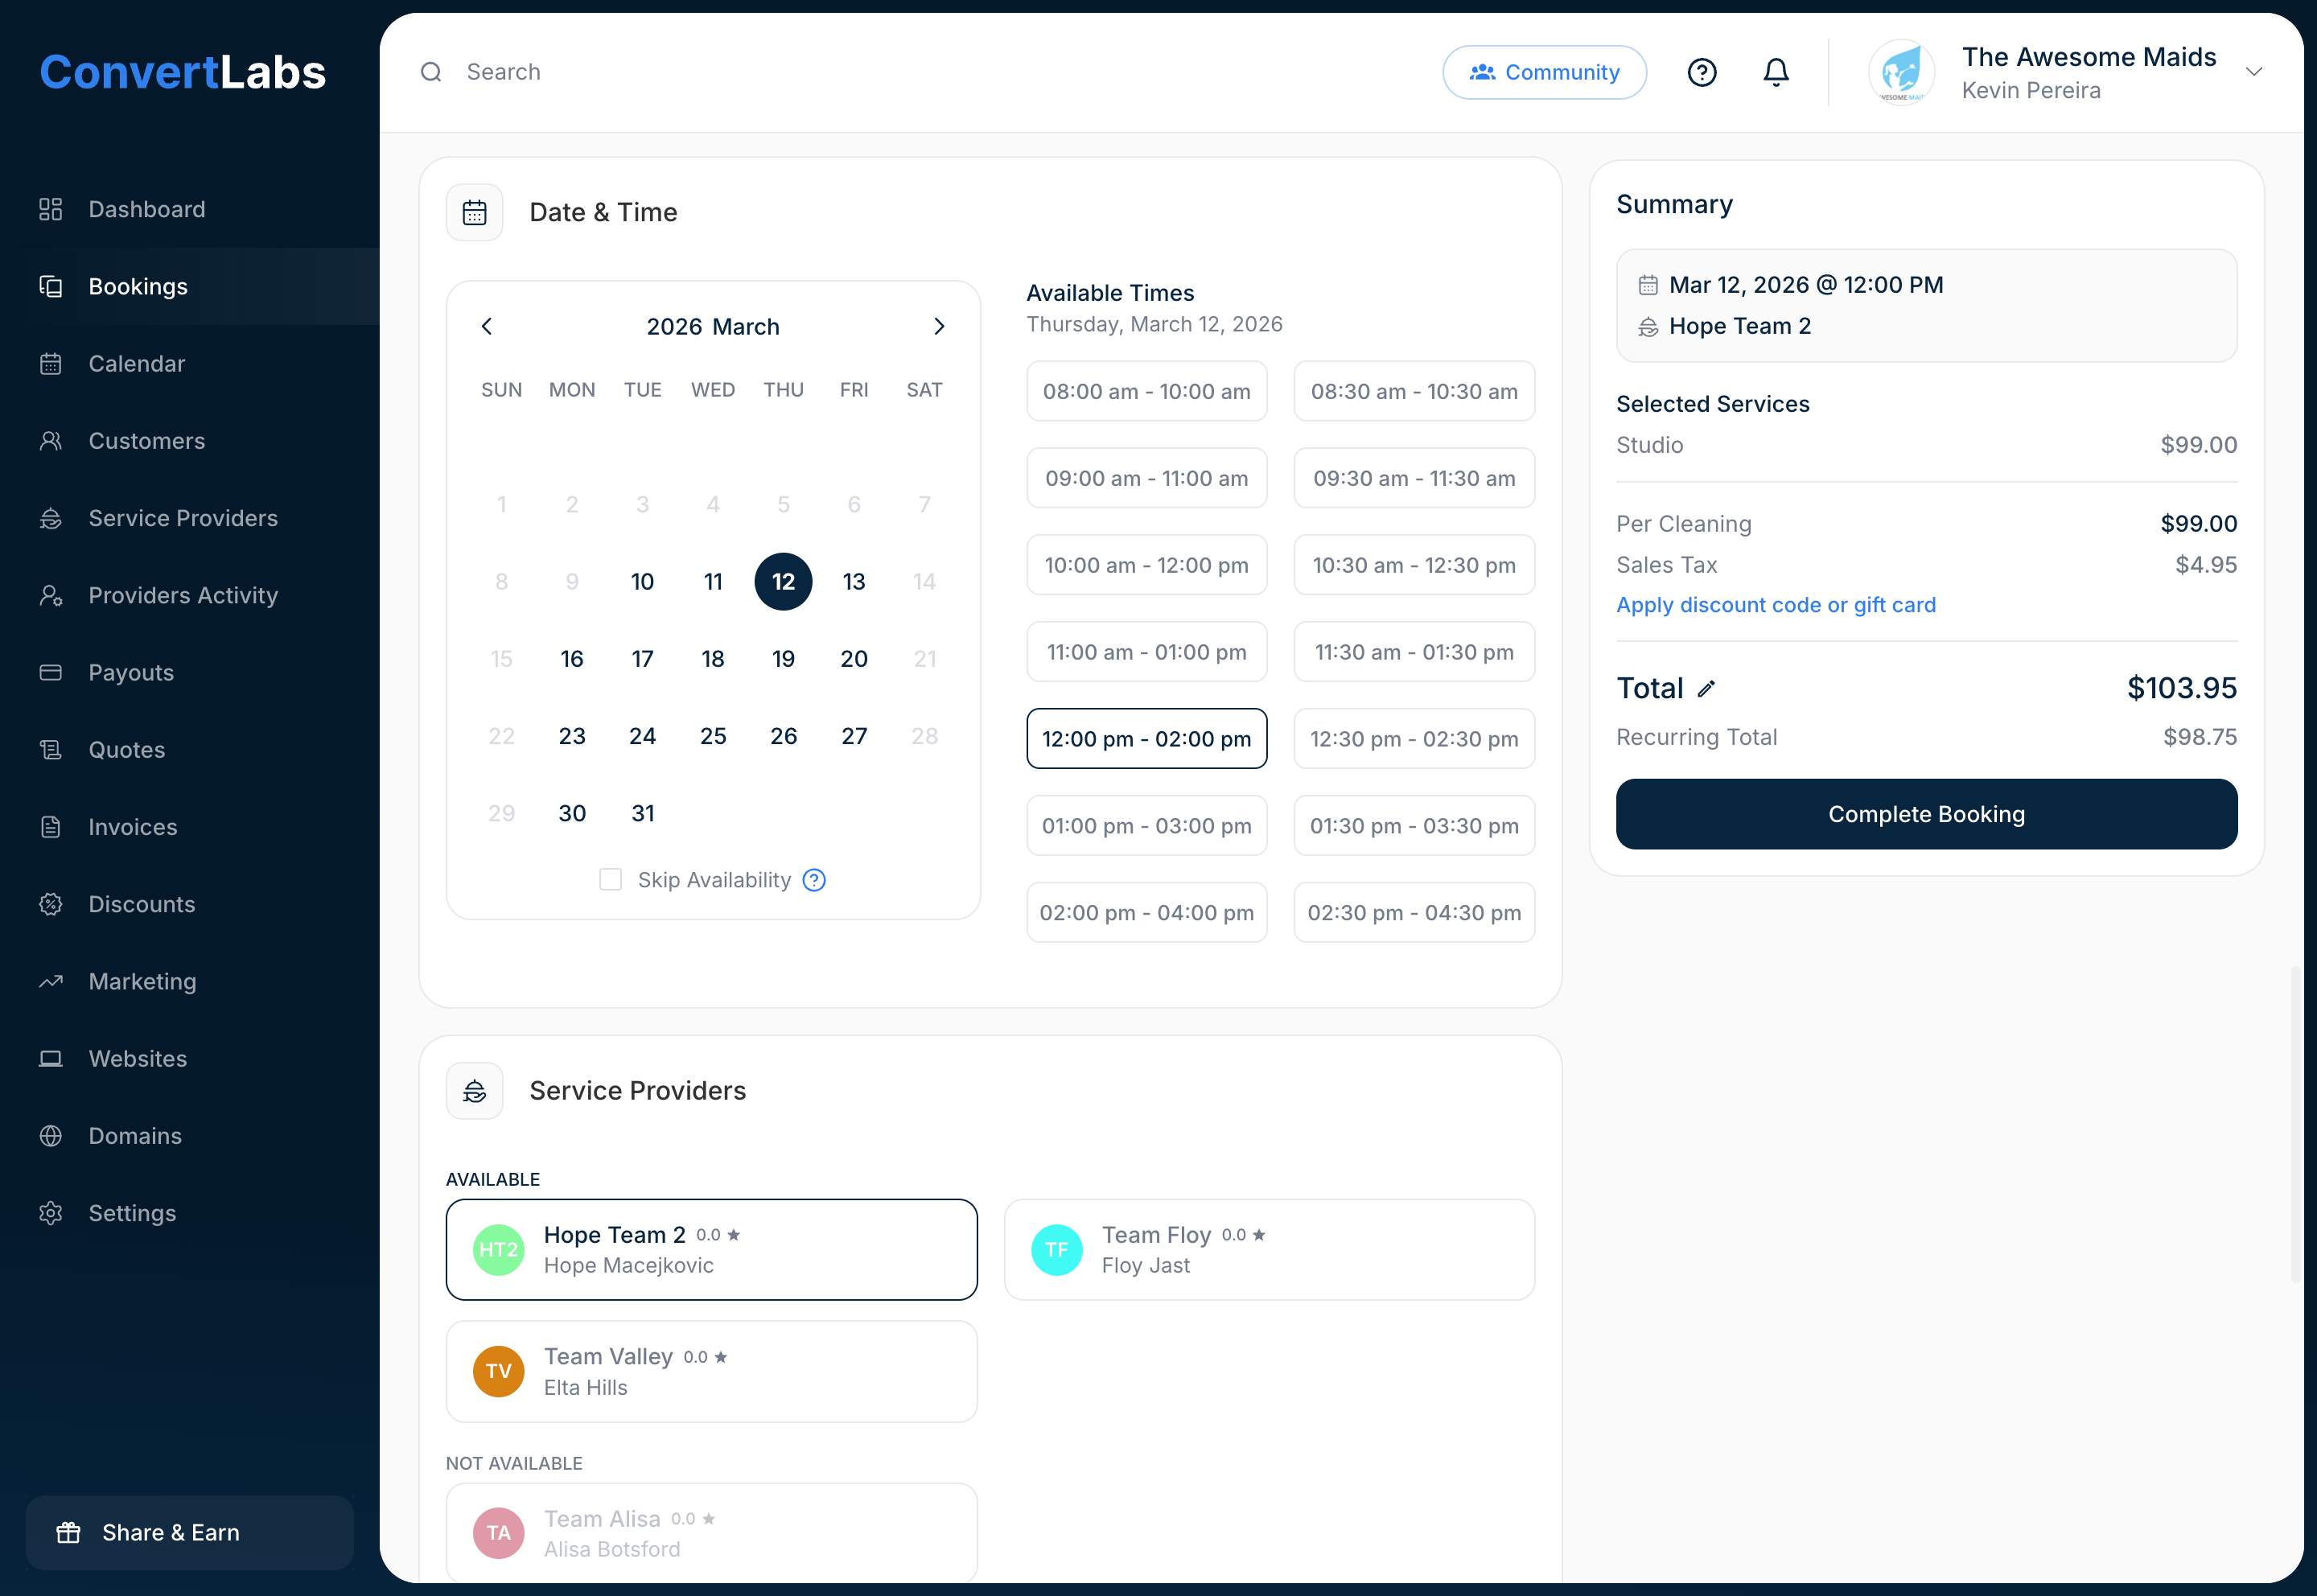
Creating Bookings from the Calendar
You can create new bookings by clicking on available slots in the Scheduler.
- Click any empty white slot on the calendar background
- The Booking Form opens automatically with the selected time slot pre-filled and the Service Provider already selected
- Fill in booking and customer details, and submit
Important: Configure Working Hours
⚠️ Recommended setup
The Scheduler automatically determines the time range displayed based on your team's working hours.
This means:
- The calendar will not show the full 24-hour day (12:00 AM – 11:59 PM)
- Instead, it focuses on hours where providers are actually working
✅ Best Practice: Make sure each Service Provider has their working
hours configured. This ensures the calendar focuses only on relevant working hours.